A straight toilet swap — same spot, same rough-in, no surprises under the old one — is one of the cheapest plumbing jobs a licensed pro will do, and one of the few that a lot of homeowners handle themselves. Most people pay $250 to $800 all-in for a standard replacement, with the fixture itself and the labor to set it splitting that range roughly in half. Moving the toilet, dealing with a damaged flange, or stepping up to a wall-mounted or upflush unit changes the math considerably.
What You’re Actually Paying For
A toilet installation quote is really two line items: the fixture and the labor to set it. The toilet itself ranges from about $100 for a basic two-piece to $400–$600 for a good one-piece or comfort-height model, and up past $1,500 for a designer or smart toilet with a bidet seat built in. Labor for a straight swap runs $150 to $450 — plumbers price it as a flat job more often than by the hour, since a competent installer can pull an old toilet and set a new one in under two hours. We break every quote into the fixture cost and the labor to set it because that split is where estimates go wrong, a process detailed in How We Estimate.
One-piece toilets cost more than two-piece up front but have no seam between tank and bowl to trap grime, and they’re a few pounds lighter to maneuver alone, which matters if you’re doing this yourself. Comfort-height (also sold as ‘ADA height’ or ‘right height’) toilets sit about 2 inches taller than standard — worth paying for if anyone in the house has knee or hip issues, and it’s become close to the default height in newer toilets regardless.
| Toilet Type | Fixture Cost | Typical Installed Cost |
|---|---|---|
| Standard two-piece | $100–$250 | $250–$500 |
| One-piece | $300–$600 | $450–$800 |
| Comfort/ADA height | $200–$450 | $350–$700 |
| Wall-mounted (in-wall tank) | $500–$1,200 | $1,500–$3,500 |
| Upflush / macerating | $400–$900 | $900–$1,800 |
What Pushes the Price Up
The rough-in — the distance from the wall to the center of the drain, almost always 12 inches but sometimes 10 or 14 in older houses — has to match the toilet you buy or it won’t sit against the wall right. That’s a measuring problem, not usually a cost problem. The real cost drivers are underneath the old toilet, where nobody looks until it’s off.
- Moving the toilet’s location means rerouting the drain line and vent stack, not just the fixture — add $500 to $1,500+, and in most places it needs a permit and an inspection because you’re altering the drain-waste-vent system.
- A cracked or corroded flange (the ring the toilet bolts to) is common on any house over 20 years old and adds $150–$350 to repair or replace before the new toilet can go on.
- Water damage under the old toilet — from a wax ring that failed slowly rather than all at once — can mean subfloor repair at $8 to $24 per square foot, discovered only once the fixture is pulled.
- An old supply valve that won’t fully shut off, or is seized, is a $20–$75 part but forces a water-main shutoff and adds time to the job.
- Wall-mounted and upflush toilets cost more to install than to buy: wall-mounted needs an in-wall carrier frame built into the wall cavity, and upflush units need a macerating pump wired to a dedicated circuit.
Is This a DIY Job?
A straight swap is genuinely one of the more approachable DIY plumbing jobs: shut the supply valve, drain and disconnect the old toilet, unbolt it from the flange, scrape off the old wax ring, set a new ring, bolt down the new toilet, and reconnect the supply line. Most people who’ve done basic home repairs before can do it in an afternoon with under $50 in parts beyond the toilet itself.
The two mistakes that turn a DIY job into a service call: not measuring the rough-in before buying (a toilet built for a 12-inch rough-in simply won’t sit right on a 10-inch one), and over-tightening the closet bolts, which is the single most common way DIYers crack a toilet base — snug and even beats hard on both sides.
Call a plumber instead if the flange is broken, below the level of the finished floor, or you’re moving the toilet to a new spot. All three turn a bolt-down job into cutting into the drain-waste-vent system, which is where permits, inspections, and actual plumbing skill start to matter.
If You’re Taking the DIY Route
Everything below is for a straight swap onto an existing, undamaged flange — the job described above as genuinely DIY-friendly.
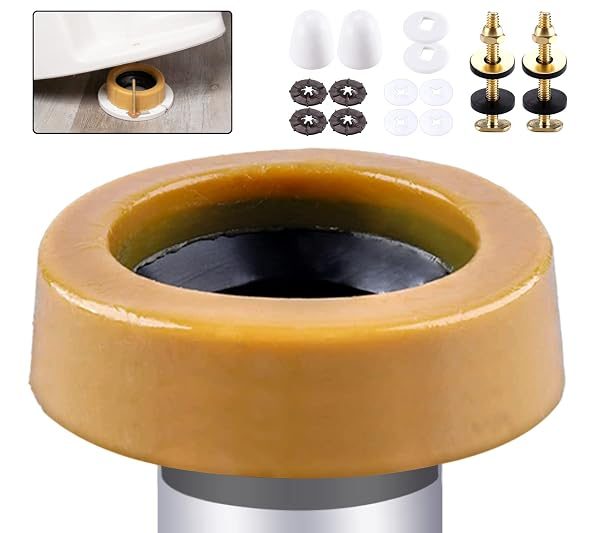
- Extra Thick Wax Ring Kit with Bolts & Caps — An extra-thick wax ring is more forgiving than a standard one if your flange sits slightly below the finished floor, which is common after a flooring upgrade — it seals the gap that a standard-thickness ring won’t reach.
- Compare current toilets — Confirm your rough-in measurement first, then filter by that number — a 12-inch rough-in covers the large majority of American houses, but it’s worth measuring rather than assuming.
- Toilet installation tools — A basin wrench, an adjustable wrench, and a putty knife for scraping the old wax ring cover everything this job needs beyond what’s already in most toolboxes.
Stop and call a plumber if the flange is cracked, sitting below the finished floor, or you’re relocating the toilet — any of those means opening up the drain line, which is a different job with a permit attached in most municipalities.
The number worth confirming before you buy anything is the rough-in distance, not the price. A toilet that’s a perfect match for the room but wrong for a 10-inch rough-in will not fit flush against the wall no matter how good the installer is, and that mistake shows up after the toilet’s already unboxed. Measure from the wall to the center of the two closet bolts on the old toilet, and buy to that number.
More Cost Guides
- Clawfoot Tub Reglazing Cost in 2026: Inside, Outside, and Whether to Ship It Out
- Tub-to-Shower Conversion Cost in a 60-Inch Alcove: What Moving the Drain Adds (2026)
- Bathroom Refinishing Cost by Surface: Tub, Tile and Vanity Top in One Visit (2026)
- Hardwood Floor Refinishing Cost: Screen & Recoat vs. Full Sand in 2026
Leave a Reply