DIY Cost Finder

Real cost breakdowns for home projects — as an Amazon Associate we earn from qualifying purchases, but the numbers are ours.

Author: DIY Cost Finder Team

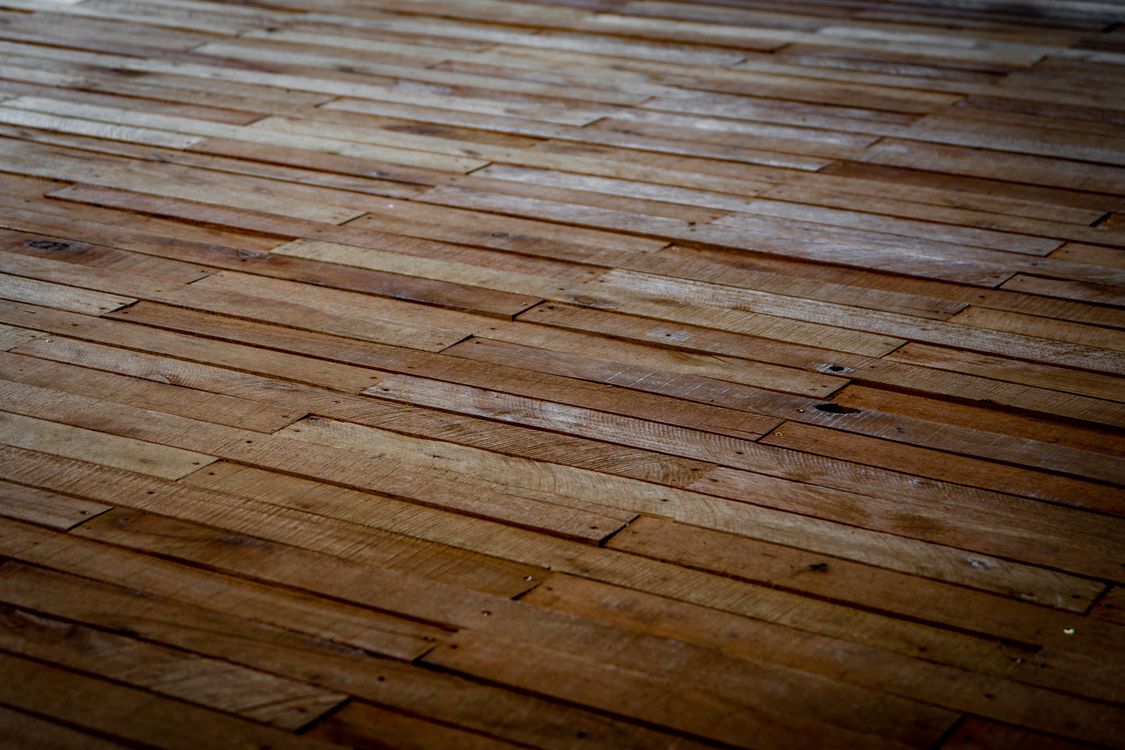
  • Hardwood Floor Refinishing Cost: Screen & Recoat vs. Full Sand in 2026

    Hardwood Floor Refinishing Cost: Screen & Recoat vs. Full Sand in 2026

    Not every worn hardwood floor needs a full sand-down. If the wood itself isn’t exposed, a much cheaper and faster fix might get you 90% of the way there. Here’s how to tell which one you actually need, and what each costs.

    Bottom line

    $1.50 – $8.00 per sq ft

    Screen & recoat (finish is worn, no bare wood): $1.50-$3.50/sq ft. Full sand & refinish (bare wood, deep scratches, or color change): $3.50-$8.00/sq ft.

    How to Tell Which One You Need

    Look at the floor in bright light. If the finish is dull, scuffed, or has lost its shine but you can’t see actual bare wood anywhere, you’re a screen-and-recoat candidate — that’s a light abrasion of the top finish layer followed by a fresh coat, done in a day, with way less dust and no wood removed. If you can see bare wood, deep scratches, water stains, or gaps where old finish has worn through, or you want to change the stain color, you need a full sand: taking the floor down past the old finish and some wood, then refinishing from scratch.

    Screen and recoat only works if the floor has enough finish layers left to grab onto — if it’s been screened multiple times before or the wood is already exposed in spots, you’re not saving money, you’re deferring the real job.

    Where DIY Actually Makes Sense

    This is one of the more genuinely DIY-friendly projects on this site, with a real caveat: scope matters a lot. A screen-and-recoat kit or rental buffer is low-risk and reasonably forgiving — a solid weekend project for most people. A full sand-and-refinish is a different animal: renting a drum sander, edger, and buffer runs $150-$200/day, and the failure modes are expensive — drum marks, uneven sanding, and blotchy stain are common first-timer mistakes, and fixing a botched DIY sand job often costs more than just hiring a pro would have. DIY full-sand makes the most sense under about 300 sq ft, where a mistake is cheaper to live with or redo. Above that, or if you’re dealing with stairs, pet stains, water damage, or engineered (not solid) hardwood, hire it out.

    Find Your Number

    Area Screen & Recoat Full Sand & Refinish
    Small room (~150 sq ft) $225 – $525 $525 – $1,200
    Medium room (~300 sq ft) $450 – $1,050 $1,050 – $2,400
    Large room / open area (~500 sq ft) $750 – $1,750 $1,750 – $4,000
    Whole floor (~1,000 sq ft) $1,500 – $3,500 $3,500 – $8,000

    Professional pricing above. DIY (sander rental + materials) typically runs 40-60% less for the full-sand column — roughly $1.50-$3.00/sq ft — but budget for mistakes if it’s your first time.

    What Pushes the Price Up

    • Stain or color change: going darker or changing wood tone significantly adds time (and risk of blotching), typically $0.50-$1.50/sq ft more.
    • Wood species: exotic or very hard woods (like some engineered or reclaimed floors) need different sanding equipment and more passes.
    • Repairs first: replacing damaged boards, fixing squeaks, or patching gaps before refinishing adds a separate line item, often $5-$15 per board.
    • Dustless/containment systems: if you want the low-dust sanding method (common in occupied homes), expect a modest premium over standard sanding.
    • Finish type: oil-based polyurethane is cheaper than water-based or hardwax oil finishes, but has stronger fumes and a longer cure time.

    Practical Tips

    • Do the finger-scratch test. Lightly scratch an inconspicuous spot with a fingernail. If it leaves a mark but doesn’t dig into wood, you’re likely fine with a recoat.
    • Get multiple pros to look in person. Refinishing needs are hard to quote accurately from photos — a phone estimate is a starting point, not a number to plan around.
    • Ask about dust containment. Older sanding methods can leave dust throughout the house for weeks; modern dustless systems cost a bit more but are worth it if you’re staying in the home during the work.
    • Budget for furniture moving. Some quotes include it, some don’t — ask before assuming.
    • Recoat sooner rather than later. Catching a worn finish before wood is exposed is what keeps you in the cheap screen-and-recoat category instead of the full sand.

    Costs above are national averages from current flooring industry pricing data as of mid-2026. Actual costs vary by region, wood species, and floor condition — get two or three written quotes from local flooring contractors before deciding.

    Related Cost Guides

    If you’re handling this yourself, the materials are the easy part to source —
    current options and pricing for floor polyurethane
    will depend on your material and the size of the job.

    More Cost Guides

  • Tank vs. Tankless Water Heater Cost: The 20-Year Math by Household Size (2026)

    Tank vs. Tankless Water Heater Cost: The 20-Year Math by Household Size (2026)

    Your water heater dies on a Tuesday and suddenly you’re making a decision you didn’t plan to make: swap in the same tank you had, or spend more upfront on a tankless unit that’s supposed to pay you back later. Both are legitimate choices. Here’s the real math so you’re not guessing under pressure with a plumber standing in your basement.

    Bottom line

    $600 – $5,600 installed

    A like-for-like tank swap: $600-$3,100 (most land $900-$1,800). A tankless upgrade: $1,400-$5,600 (most land $3,000-$4,500).

    Two Honest Options, Not a “Right Answer”

    This isn’t a case where one option is secretly better and installers are hiding it from you. Both are real, defensible choices:

    • Quick tank swap: cheaper upfront, faster (usually done same day), and a fine choice if you’re not planning to stay in the house long or don’t want to spend more right now.
    • Tankless upgrade: costs more to install, but lasts almost twice as long (15-20 years vs. 8-12 for a tank) and saves $100-$200 a year in energy. Over 20 years, the numbers usually tilt toward tankless being cheaper overall once you count a tank’s replacement cycle.

    Neither of these is a DIY project, for what it’s worth — you’re dealing with gas lines, 240V electrical circuits, or both, plus code-required venting. This is one of the few areas where “just do it yourself to save money” is a genuinely bad idea, not just an inconvenience. Get a licensed plumber either way; the decision that’s actually yours to make is tank vs. tankless, not DIY vs. professional.

    Find Your Number

    Household Tank Swap (installed) Tankless (installed)
    1 bath, 1-2 people $600 – $1,400 $1,400 – $2,800
    2 bath, 3-4 people $900 – $1,800 $2,800 – $4,000
    3+ bath, 5+ people $1,200 – $3,100 $3,500 – $5,600

    Tankless sizing is really about peak flow rate (GPM), not headcount — a house running two showers and a dishwasher at once needs more capacity than the math above assumes. A plumber will size it off your actual fixture count, not a household-size chart. Undersizing is the single most common tankless mistake: it shows up as a lukewarm shower the second someone else turns on a faucet.

    Why Tankless Costs More to Install

    • Gas units need a two-pipe venting system and often a larger gas supply line (3/4″ minimum) — that alone is $350-$2,000, and can hit $2,000 if there’s no gas line at all yet.
    • Electric units often need a 200-amp panel and multiple dedicated 240V circuits. A panel upgrade runs $850-$1,700 on top of the unit and labor.
    • Labor alone is $600-$2,500 for 3-10 hours of work, more if venting or electrical work is involved.

    A tank swap almost never needs any of this if you’re replacing like-for-like in the same spot with the same fuel type — that’s most of why it’s so much cheaper to install. Nationally, a full gas tankless install (unit, venting, labor) now averages around $4,250 — most of that gap over a tank swap is the venting and gas-line work above, not the unit itself.

    The 20-Year Math

    This is the part that actually matters for the tank-vs-tankless decision, not just the sticker price:

    • Tank, 20 years: roughly $14,800-$20,800 total once you count two replacement cycles (tanks last 8-12 years, occasionally 15 with real maintenance) plus higher ongoing energy bills.
    • Gas tankless, 20 years: roughly $12,000-$18,000 total — one unit, lower energy bills, if you descale it periodically in hard-water areas.

    So tankless usually wins on total cost of ownership, but the gap isn’t dramatic, and it assumes you stay in the house long enough to see it play out and actually maintain the unit. If you’re selling in three years, the cheaper tank swap is the financially rational choice, not the “lesser” one.

    The Third Option Nobody Mentions: Heat Pump Water Heaters

    There’s a middle option most quotes won’t bring up unless you ask: a hybrid heat pump water heater. It pulls heat from the surrounding air instead of burning gas or using pure electric resistance, and runs $2,500-$6,500 installed — roughly in between a tank and a gas tankless. It’s the most efficient of the three by a wide margin, but it needs a decent-sized space with airflow (a small closet won’t cut it), produces cool exhaust air and some condensate drainage, and recovers hot water slower than tankless during heavy use. Worth asking about if efficiency matters more to you than upfront cost or recovery speed — just don’t assume the federal tax credit picture is the same as it was a year ago; incentive rules have shifted, so check your state energy office and utility for current rebates rather than relying on older articles.

    Practical Tips

    • Get quotes for both options, not just one. A plumber who only quotes tankless (usually a bigger job for them) or only quotes tank (less work to sell) isn’t necessarily giving you the full picture. Ask for both prices.
    • Ask what “installed” includes. Permits, gas line or panel upgrades, and disposal of the old unit sometimes get itemized separately after the fact. Get it all in one written quote.
    • Don’t undersize a tankless unit to save money. A too-small unit that can’t keep up during peak use is a worse outcome than just buying a tank in the first place.
    • Check for rebates. Some utilities and states offer $50-$500+ rebates for efficient tankless or heat-pump water heaters — worth five minutes of searching before you buy either option.
    • Descale a tankless unit yearly in hard-water areas. Skipping this is the main reason tankless units fail early and don’t hit their 15-20 year lifespan.

    Costs above are national averages from current plumbing industry and contractor pricing data as of mid-2026. Actual pricing varies by region, local labor rates, and your home’s existing gas/electrical setup — get two or three written quotes from licensed plumbers covering both a tank and tankless option before deciding.

    Related Cost Guides

    More Cost Guides

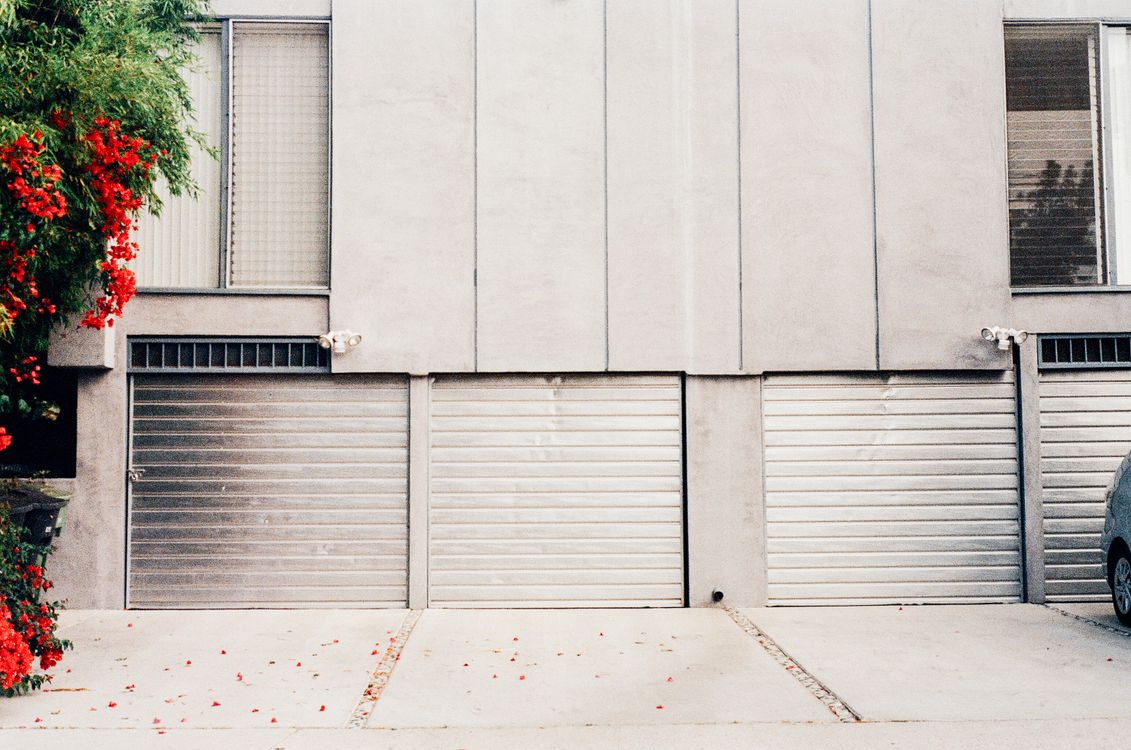
  • Garage Door Replacement Cost: Single, Double and Insulated (2026)

    Garage Door Replacement Cost: Single, Double and Insulated (2026)

    A garage door is the biggest moving object on most houses, and it’s also the single highest-ROI project you can do to it — recouping around 268% of its cost in resale value, according to the 2026 Cost vs. Value Report. That’s not a typo. It ranked #1 out of 28 common remodeling projects, in every region of the country. Here’s what one actually costs.

    Bottom line

    $800 – $12,000 installed

    A typical insulated steel double door, installed, reusing your existing opener: $1,800-$4,000, most land around $2,750. Wood and full-view custom doors run well beyond that.

    Why This Isn’t a Springs-and-a-Saturday DIY Project

    Full disclosure up front: unlike painting or even a mini-split, a full garage door replacement isn’t something to save money on by doing it yourself — and it’s not about the door panels being heavy. It’s the torsion spring. A closed garage door spring stores 25,000-35,000 inch-pounds of energy, enough to seriously injure or kill someone if it’s released wrong. Professional installers have the winding bars and training for it; a YouTube tutorial doesn’t substitute for that. If a quote seems oddly cheap and skips a licensed installer, that’s a red flag, not a deal.

    Where you actually have DIY room: swapping just the opener (no spring work involved) is a legitimate weekend project, usually $150-$400 in parts. The door itself — get it installed by a pro. This is a case where “done right” isn’t the upsell; it’s the only safe option.

    Find Your Number

    Size & Style Steel (installed) Wood/Carriage-Style (installed)
    Single car, non-insulated $844 – $1,800 $2,200 – $4,000
    Single car, insulated $1,400 – $2,800 $3,000 – $5,500
    Double car, insulated (standard) $1,800 – $4,000 $5,000 – $9,000
    Double car, premium/full-view $3,500 – $6,000 $7,000 – $12,000

    These assume you’re keeping your existing opener. Add $250-$700 if the opener needs replacing too, and factor in $50-$150 for hauling away the old door.

    What Actually Moves the Price

    • Insulation: a non-insulated steel door is the cheapest option and fine for a detached garage. Insulated (usually a steel-polyurethane-steel sandwich) costs more but matters a lot if the garage is attached or heated.
    • Windows: adding a row of windows for light typically adds $200-$600, more for full-view glass-and-aluminum doors.
    • Track and hardware condition: if your existing track, rollers, or cables are worn, an installer will often recommend replacing them at the same time — usually $100-$300 more, and worth doing since you’re already paying for a service call.
    • Old door removal: most quotes include haul-away, but confirm it’s in writing. Some installers charge $50-$150 extra if you don’t ask upfront.
    • Custom sizing: anything other than a standard single (8-9 ft) or double (16 ft) opening adds a custom fabrication cost, sometimes significant.

    The ROI Angle, and Why It’s Real

    A new garage door recouping 268% sounds like marketing math, but the logic actually holds up: the garage door often covers up to a third of a home’s street-facing front, so it does more to shape a buyer’s first impression than almost anything else you could spend the same money on. It also acts as a signal — buyers read a fresh, well-fitted garage door as evidence the rest of the house has been maintained, which reduces their perceived risk (and therefore how hard they negotiate). For comparison, a kitchen remodel recoups around 96%, and a full bathroom remodel is often lower. If you’re weighing a handful of pre-sale projects, this is usually the one to do first.

    Steel vs. Wood or Carriage-Style

    Steel is the default for a reason: it’s durable, needs almost no maintenance, and comes in insulated or non-insulated versions at a fraction of wood’s cost. Carriage-style doors (steel or composite made to look like old barn doors) split the difference — the curb-appeal upgrade of wood without the upkeep, usually $200-$800 more than a comparable plain steel door. Real wood looks the best and costs the most, plus it needs re-staining or re-painting every few years to hold up, which is worth factoring into the “done right” number if you’re the one who’ll be maintaining it.

    Practical Tips

    • Get at least two written quotes. Garage door pricing varies more by installer markup than by the door itself — a $1,000 spread on the same door isn’t unusual.
    • Ask what’s included in “installed.” Old door removal, new track/hardware, and opener compatibility check should all be spelled out, not assumed.
    • Match the opener to the door weight. An insulated door is heavier; an older 1/3 HP opener may struggle with it. Ask the installer to confirm compatibility before they leave.
    • Don’t DIY the spring, full stop. If a quote is unusually low and the installer suggests you handle any part of the spring system yourself, get a different quote.
    • If you’re selling within a year or two, prioritize this project. It’s the rare home improvement where the numbers actually favor doing it purely for resale value.

    Costs above are national averages from current garage door industry pricing and the 2026 Cost vs. Value Report as of mid-2026. Actual pricing varies by region, door size, and local installer rates — get two or three written quotes from licensed garage door installers before deciding.

    Related Cost Guides

    More Cost Guides

  • Interior Painting Cost: DIY vs. Professional, Per Room in 2026

    Interior Painting Cost: DIY vs. Professional, Per Room in 2026

    Painting is the one home project where “just do it yourself” is actually solid advice, not a warning label. No gas lines, no electrical panels, no permits. It’s paint, time, and whether you value your weekend more than a few hundred dollars. Here’s what both routes actually cost.

    Bottom line

    $150 – $2,890 per room

    DIY materials only: $150-$400 per room. Hire a pro: $300-$2,000+ per room depending on size and prep. Whole house: $3.75/sq ft walls only, $6.75/sq ft with trim and ceilings.

    What You’re Actually Deciding

    Labor is 70-95% of a professional painting bid — the paint itself is only 15-20% of what you’re paying for. That’s the whole story of why DIY is so much cheaper: you’re not buying different paint, you’re just not paying someone $20-$75/hour to apply it. A pro takes 3-5 hours per room; doing it yourself takes 8-12, mostly because you’re not doing this every day and you’re being (correctly) careful about the trim.

    Find Your Number

    Room DIY (materials only) Professional
    Standard bedroom (12×12) $150 – $300 $400 – $850
    Living room $200 – $400 $600 – $2,000
    Kitchen (walls only) $75 – $150 $150 – $250
    Whole house interior (avg. size home) $800 – $2,000 $3.75-$6.75/sq ft

    Kitchens run cheap because cabinets, backsplash, and appliances eat most of the wall space — there’s just less to paint. National average for a professionally painted room lands around $624.

    What’s in the Materials Cost

    • Paint: $25-$70/gallon depending on quality, one gallon covers ~350 sq ft with one coat. Most rooms need 2 coats and 1-2 gallons.
    • Primer: $15-$30/gallon — skip this at your own risk if you’re covering a dark color or bare drywall; it’s the difference between 2 coats and 4.
    • Supplies: brushes, rollers, tape, drop cloths — $30-$80 if you’re starting from zero, less if you already own basics.
    • Trim and doors: $1-$4 per linear foot if you’re paying a pro to do them; DIY it’s just more of your own time with a smaller brush.
    • Wall prep/patching: $0.50-$0.75/sq ft if a pro is doing it; if you’re skipping this step yourself to save time, know that it shows.

    When DIY Actually Makes Sense (and When It Doesn’t)

    For one or two rooms, DIY genuinely saves $150-$350 per room and the skill ceiling is low — rolling a wall isn’t a specialized trade. Where it stops being a clear win:

    • Vaulted or very high ceilings. This is where “just do it yourself” turns into a ladder safety problem. Pay someone with the right equipment.
    • Whole-house repaints. The time cost adds up fast — 8-12 hours per room times every room in the house is a multi-week project around a job and a life. A pro crew does it in days.
    • Heavy prep work. Patching cracked drywall, dealing with popcorn ceilings, or covering serious water stains is a different skill than rolling paint. Bad prep is the single biggest reason DIY paint jobs look DIY.
    • You’re selling soon. A rushed, slightly uneven DIY job can actually hurt a listing more than a dated-but-professional paint job. This is one of the few times “good enough” isn’t actually good enough.

    Finish and Sheen Actually Change the Price

    Not all paint is priced the same, and the difference isn’t just marketing. Flat/matte is the cheapest and hides wall imperfections best, but it’s harder to wipe clean — fine for ceilings and low-traffic bedrooms. Eggshell and satin cost a bit more and are the practical middle ground for most living spaces and hallways: washable, not too shiny. Semi-gloss and gloss cost the most per gallon and show every roller mark and wall flaw, but they’re the right call for trim, doors, and bathrooms where moisture and scuffing are real issues. If a quote seems unusually cheap, check what sheen they’re actually planning to use — it’s a common place for corners to get cut.

    Practical Tips

    • Don’t cheap out on paint if you’re doing the labor yourself. The paint is a small fraction of the total cost either way, and cheap paint needs more coats, which erases your time savings.
    • Get a few professional quotes even if you’re leaning DIY. If a full room comes in under $400, the time savings from doing it yourself might not be worth your weekend.
    • Ask what a professional quote includes. Wall prep, primer, trim, and doors sometimes get quoted separately and added later. Get one written number covering everything.
    • Buy 10% more paint than the math says. Running out mid-wall and trying to color-match a new can later, is a bigger headache than a bit of leftover paint.
    • Ventilate and give it real drying time between coats. Rushing the second coat is the most common reason a DIY paint job ends up patchy.

    Costs above are national averages from current painting industry and contractor pricing data as of mid-2026. Actual costs vary by region, paint quality, and how much prep work your walls need — get two or three written quotes from local painters before deciding, even if you’re leaning toward doing it yourself.

    Related Cost Guides

    If you’re handling this yourself, the materials are the easy part to source —
    current options and pricing for a paint sprayer
    will depend on your material and the size of the job.

    More Cost Guides

  • Mini-Split Heat Pump Installation Cost: A Zone-by-Zone Breakdown for 2026

    Mini-Split Heat Pump Installation Cost: A Zone-by-Zone Breakdown for 2026

    Let’s skip the sales pitch. A mini-split is two boxes and a line set — an outdoor compressor and one or more indoor units, connected by refrigerant lines and a dedicated circuit. That’s it. It’s not some mystery box that only a contractor can decode for you, and once you know what actually drives the price, you can sit across from a salesman and tell within thirty seconds whether he’s quoting you fair or fleecing you.

    Want the number for your own house? The mini-split cost calculator takes your zone count, square footage and whether you’re hiring out, and gives you a range built from the same figures used below.

    Here’s the real math on what these things cost, why the number swings so hard from job to job, and where you can actually save money without cutting corners that come back to bite you.

    Bottom line

    $2,700 – $16,000+ installed

    One room: ~$3,000–$6,500. Whole house (3–5 zones): ~$9,000–$16,000. Run your own numbers below before anyone quotes you a thing.

    🧮 Mini-Split Cost Estimator

    Two questions. No email required, no “quote request” funnel. Just a number.

    This is a ballpark, not a quote. Real pricing depends on your house, your panel, and who shows up with the ladder. Get quotes before you commit.

    What You’re Actually Paying For

    An installer isn’t charging you for magic. You’re paying for: an outdoor condenser, one or more indoor air handlers, a refrigerant line set run through your wall, a dedicated electrical circuit, and the labor to mount everything, pull a vacuum on the lines, charge the system, and make sure it doesn’t leak refrigerant into your yard for the next ten years. That last part matters — a bad vacuum/charge job is the difference between a system that runs great for 15 years and one that’s limping by year three.

    A single-zone job is a half-day to a full day of work for a two-person crew. Add zones and you’re looking at one to two full days. If someone’s quoting you a full multi-zone system in three hours, ask what they’re skipping.

    What It Actually Costs

    Ranges from real contractor data, not marketing copy:

    Configuration Installed Cost
    Single-zone (300-600 sq ft) $2,700 – $5,800
    Two-zone $4,000 – $9,000
    Three-zone $6,500 – $11,000
    Five-zone (whole small home) $10,500 – $14,500+

    Per ton of capacity, expect around $4,900-$5,000 installed, and a typical multi-zone home setup runs 3-4 tons total. Labor is 30-50% of the bill — the rest is equipment and whatever electrical work your house needs. Anyone quoting a number with no breakdown between the two is either hiding something or doesn’t itemize, and you should ask for one anyway.

    The stuff that shows up on the invoice you didn’t budget for

    • Electrical: a new breaker and circuit is $500-$2,000. A full panel upgrade because your 100A service is already maxed out is $1,000-$4,000 on top of that. Ask about this before you sign anything — it’s the number one reason quotes blow up.
    • Permits: most towns want $100-$1,000, though $150-$325 covers it in most places. Skipping the permit to save money is how you end up with a resale headache later. Not worth it.
    • Line set covers: $50-$200 each. Cosmetic, but they keep squirrels and sun damage off your refrigerant lines.
    • Condensate pump: $150-$400 if the indoor unit can’t drain downhill on its own.

    What Actually Moves the Price

    Zone count is the big one — every additional indoor head adds roughly $1,800-$2,500, even though you’re sharing one outdoor unit. Past that, here’s what’s really driving your number up or down:

    • Sizing: the rule of thumb is 20-25 BTU per square foot, adjusted for insulation, ceiling height, and sun exposure. Bigger isn’t better here — an oversized unit short-cycles, wastes energy, and does a worse job dehumidifying than a properly sized one. Don’t let anyone upsell you on capacity “just to be safe.”
    • SEER2 rating: higher-efficiency units cost more today, save you money over the next decade. Do the math on your own utility rates before deciding this one’s a no-brainer.
    • Line set length: a standard install includes about 25 feet. Past that, expect $50–$150 per additional 10 feet, per indoor head — and awkward routing through finished walls or between floors adds labor hours on top of the material.
    • Access: an easy side-yard condenser pad is cheap. Crane work or tearing into finished space isn’t.
    • Your panel: an older, maxed-out 100A panel usually needs work before anything gets added safely. Find this out before you fall in love with a quote.

    What to actually budget

    One room — a bonus room, garage conversion, sunroom your main system can’t reach — figure $3,000-$6,500 with permits and a basic circuit. Whole-house, 3-5 zones, figure $9,000-$16,000, more if your panel needs work. DIY “quick connect” kits run $1,500-$3,500 less per zone, and yeah, they’re tempting — but most manufacturer warranties are void unless an EPA-certified tech does the vacuum and charge. Weigh that before you go it alone.

    Why 2026 Quotes Beat Last Year’s Numbers

    If your quotes are landing above the ranges above — or above what you read in a guide written a year or two ago — there is a reason, and it is refrigerant. Every mini-split built for the 2026 season runs R-32 or R-454B — mildly flammable A2L refrigerants — instead of the R-410A that everything used until the changeover. New equipment, new tooling, leak detection built into the indoor units, and installers who have to be certified to handle it. That puts roughly ten to fifteen percent on the equipment side of a quote. Labor did not move.

    Two things follow. A quote landing twelve percent above a cost guide written two years ago is not evidence of anything, so check it against current numbers or you will talk yourself out of a fair price. And if someone offers you a notably cheap R-410A system out of remaining stock, understand what you are buying: the equipment is fine and will run for years, but you are on the wrong side of a phase-down, and the refrigerant to service it gets scarcer and dearer every year it ages. On a system you expect to keep fifteen years, that discount is a loan against your own repair bills.

    Worth asking any installer directly: which refrigerant is the system you have quoted me on, and are you certified for A2L? An answer that wanders tells you something about the rest of the job.

    How Not to Get Taken

    • Get three quotes, no exceptions. This category has more price variance than almost anything else in HVAC because so much rides on the installer’s electrical scope. Identical jobs, $2,000 apart, is normal. Don’t take the first number.
    • Make them itemize it. Permits, line set covers, and electrical work either get bundled in or tacked on later as “surprises.” Get it in writing up front.
    • Check for rebates before you buy. The federal 25C tax credit died at the end of 2025, but plenty of state energy offices, utilities, and manufacturers still kick back $200-$1,500+ on efficient units. Five minutes of searching your state’s energy office site can pay for itself many times over.
    • Zone it right, don’t just go big. One oversized unit for an open floor plan is a worse long-term bet than two properly sized zones. It costs a bit more up front and less every month after.
    • Buy in the off-season. Spring and fall, between the AC rush and the heating rush, is when contractors have room in the schedule and room to negotiate.

    These numbers are pulled from current contractor and industry pricing data as of mid-2026, not invented figures. Your actual cost depends on your region, your electrician’s rates, and what’s already going on behind your walls — get two or three written, itemized quotes from licensed HVAC contractors before you lock in a budget.

    More Cost Guides